


Showing posts with label Crafts. Show all posts

Tuesday, November 8, 2011

DIY Deer Head Sculpture...

My love for natural eclectic decor continues...
I have been wanting a deer head for
my gallery wall in my office for sometime now.
Not like a taxidermists work of art, like one
that used to have a pulse, but a sculpture painted solid white.
 I wasn't liking the prices I saw of sculptures...
So, I decided to make my own deer head sculpture.
I love how it turned out & I also
love the price {$8.00!!}


There is the lovely little deer head I made...
I love how it turned out. 
It was very simple & affordable...


First I bought a paper mache reindeer from Michaels craft store.
{I got it with a %50 off coupon, so it was only $8.00}
I then chopped off the head of the reindeer.. I felt very morbid during this point,
I am officially on Santa's naughty list this year!!
I used the wall as a reference to how much I should chop off to see how
it would hang on the wall. After I got it perfect, I spray painted it white.
{I used a high gloss white spray paint}
& voila there you have your very own deer head sculpture. 


I love the deer sculpture added to my gallery wall
because it adds more of the masculine feel I was going for.
You can see more on the gallery wall {here}


To hang the deer head on the wall, I simply used one
nail to hang the head on, You may find a different
way to hang yours, It just depends on how you 
want it to hang.


The gallery wall is still in progress, but this deer
head adds a great element to the gallery wall.


I like the frame around the deer,
but mounting it on a board or simply hanging
it on the wall would look great as well!


I think I am in love... & I am going to love working
under this little deer at my desk. I think he 
needs a name...  & yes it's a he :)


This is one of my favorite crafts I have done in a while. 
Do you have an antler or deer head art in your house?
I would love to see it.. link it up on the Facebook page {here}.
I hope you all are having a great week so far... I am 
working on a few furniture projects, so it has been a great week!
xx Liz Marie

Saturday, November 5, 2011

The Office Begins...

This room has been many things in the short amount of
time since we built our house a little over a year ago.
First it was an office painted yellow, then it changed to our second 
spare bedroom with a bed for guests, & now it's being transformed into
an office once again... & I'm bringing you along for the journey.
The room is painted Benjamin Moore's Bennington Gray
& it's ready to become a place of inspiration, crafting, &
a great place to work, but for now it's under construction...


I decided to start with the gallery wall in the office since
it will be the main focal point as you walk in the door to the room.
Empty Frames?!? I didn't even notice... haha Yah, I know they are empty,
but I didn't want to rush getting prints for them.. I wanted to collect
them over time & I think the frames are great on their own for now.


First I laid out my collection of frames out on
the floor & played around with grouping for a while until
I was happy. As you can see I added items later
when they were on the wall, but it's the general grouping 
idea that matters the most.


I then stenciled the shapes of the frames onto newspaper
& cut out the shapes to hang out the wall to get the placement
right & see where the nail holes should be. 
I added in the other items during editing so you can see 
the placement of them as well. 


Obviously the wall looks bare with the empty desk &
empty room... but the office is coming along & the wall will 
be the perfect feature in the office. & that bottom frame? It's a handy
little chalk board/magnet board.. how fun is that?


I am probably going to add more frames & other
items to the wall & that's the beauty of a random gallery 
wall like this, you can always add & move things around.


& this table? I got it for $10 & it's the perfect size for
crafting, & all of my accessories.. it just needs a little love.


I want to fill this wall with memories & inspirational 
prints.. I already love the one print I have on the wall.. 
an embroidered piece of burlap that 
reads forever, for always, & no matter what...


& did you notice my obsession with gold has carried into
the office? Most of these frames were found at antique stores
& I love the original gold finish.


So the office has begun. I am so excited to keep working
on it & I have so many ideas in my head. I can't
wait to bring you along on the journey of "The Office".
I am going for an eclectic antique room with a masculine edge..
Does that make sense? Well, let the journey begin!
Here was the office today after I was done sewing... It's always nice
to see someones home not all perfectly staged...


The wires are killing me.. Don't worry, those are
going to be taken care of shortly...
So there you have it.. the beginning of the office.

I hope you are all have a great weekend... My weekend
has been wonderful.. spending time with my husband...
today we spent time at the Farmers Market & downtown..
we went out for coffee & lunch at a local coffee shop.
This afternoon I delivered a lovely piece of furniture I just finished
to one of my best friends for her babies nursery {post soon!}
& tonight my husband wants to take me to go see "The 
Wizard of Oz" at our local Civic theater.. a very lovely weekend
& may I add that I'm sick? It seems everyone has this soar 
throat ickiness, & I hope it ends soon for all of us, but I'm not 
letting it ruin my fun weekend!!
Talk to you soon..
xx Liz Marie

Progress of the office:

Tuesday, October 18, 2011

Cupcake Stands...

I wanted to quickly show you how 
I made those lovely cupcake stands that you
saw in my last post {click here to see}.
They were very simple to make & better
yet, very affordable...


Before...


Yup, that's right, I made them out of martini glasses
& dinner plates from the dollar store.
You can use any glasses {Wine, Martini, exd}


I then spray painted the plates & the glasses
with Catalina Mist from Krylon
{I found it at Michael's craft store}
After the paint dried I glued the bottom of the glass
to the bottom of the plate.
{So the rim of the glass is the base of the cupcake stand}
You can use any glue, I chose to use hot glue
& it has held up great.


I chose to use all the same size glasses & plates,
but you can switch it up for variety.


For a little more added touch of lovely I added a small
doily banner to tie all of the cupcake stands together.
Not that these amazing cupcakes from Stir it up needed to 
be more lovely then they already are...


I love how the cake stands made the cupcakes
a great centerpiece for the baby shower... they turned out awesome
& I can't wait to use them again.


Have you made cake stands before?
What materials did you use?
I would love to see them...
Go link them on the Liz Marie Blog Facebook page.
I hope you are having a great week...
I will be back with a few more tutorials from the baby shower
 stay tuned...
xx Liz Marie

Sunday, October 16, 2011

A Lovely Baby Shower...

This weekend I had the honor of throwing
a lovely baby shower at my house
for one of my best friends.
I wanted to keep the decor simple
& lovely, but very feminine at the same time.
It turned out great.. 
lots of friends & family, yummy food, 
& a wonderful time opening beautiful gifts for a baby
we are all more then excited to meet!


I made the cake stands,
I will show you later this week 
how I made them.
{They only cost me $6 for all 3!!}
& I didn't get a picture of the food
table, but there was lots of
yummy dips & desserts.


These yummy cupcakes
were made by Val from Stir it up.
They were pumpkin with cream cheese frosting
& chocolate with vanilla bean frosting...
Delicious!!


The cupcake wraps are made out 
of doilies found at the craft store
& the cupcake toppers are doily hearts
on toothpicks.. 


Sorry for all the yummy cupcake pictures..
I know you are craving one now :)


I love how the colors were so soft..
Sea foam, pinks, yellows, & whites...


Mason Jars & wire baskets were a lovely
compliment to the doily decor.


Can't go wrong with cute straws...


We didn't get a really good picture of it...
but do you see the balloons hanging of the light in the background?
One of my favorite decorations of the day....


The doily garland was draped everywhere & added a
very elegant girly feel.


To make these doily banners I used paper
doilies from the craft store & twine.


I kept the decorations very simple
so the house didn't look overwhelming & crowded.


I also have a tutorial on this lovely letter "K" 
Coming this week.... 


Me with the momma to be...


I can't wait to meet you Kirby!!
All of your showers are done, & you have 
so many pretty clothes we need to
see you in. You are going to be 
one loved, beautiful little girl. 
I already love you so much!!


I hope you enjoyed seeing the lovely baby shower....
I had so much fun saturday during the party.
I wish I would have taken more pictures... but I was
busy being the hostess with the mostest & that was even better.
{Thanks Rach for most of the pictures!!}
Keep an eye out this week for some craft tutorials for the
things I made for the shower this week.
I hope you all had a great weekend... mine was wonderful & 
I got the best news today, My mom, dad, Brother & sister-in-law
will be visiting us here in NC for Thanksgiving!!!!
I am overly excited.. I can't contain myself... Well Dexter is
on so I will talk to you lovely ladies soon!!!
xx Liz Marie

Wednesday, October 12, 2011

Pinteresting Projects...

O, how I love Pinterest. 
It keeps me inspired & motivated.
Have you joined the Pinterest world yet?
If you haven't, you need to.
It's a website to keep all of your great internet finds 
organized onto boards {Home Decor, Crafts, Food, exd..}
 & where you can see other people's great finds that they 
have pinned from the world wide web as well...
Want to see what I have been pinning lately?
Follow my boards here.
I wanted to show you one of my first project that I did a while 
back that was inspired by something I found on pinterest...


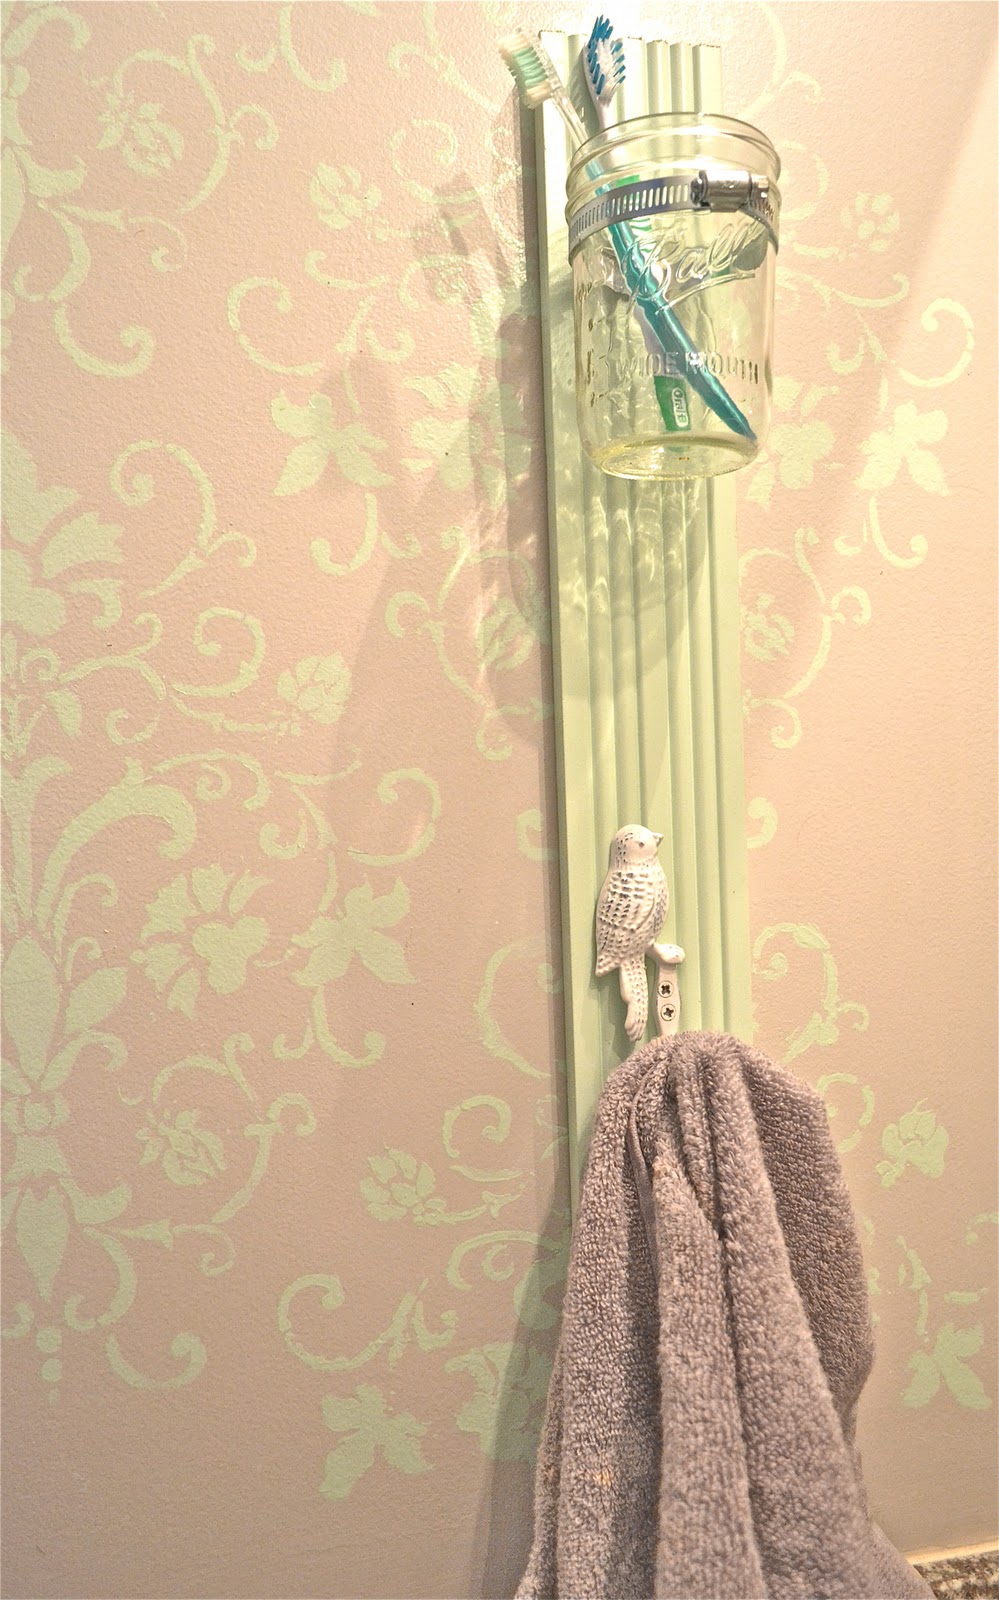
I hated our towel "ring" that existed in this space in our master bathroom
before. So I removed it & made my own towel hook/ toothbrush holder
that wouldn't be complete with out a bird hook & mason jar...


Things I used:
{I already had all of these items on hand}
piece of molding- painted the same color as the the stencil patter on the wall
Bird Hook: Wold Market {$9.99} 
Paint: I used the color left over from stenciling
Pipe clamp: You can find them at Lowes in the plumbing section
Mason Jar: I always have extras for projects like these...


Remember this mason jar bathroom organizer that I made?
You can see the full post on it here.
This organizer is in the same bathroom as my new project
I feel like the mason jars are a simple & decorative 
way to organize your everyday items..
& don't forget cheap!


O, did you notice I need to finish my stenciled wall?
yah... I'll get there. My master bedroom & bathroom are
slowly getting finished... Can't wait to show you!


Very Pinteresting eh?!? I can't wait to try more crafts 
that I have pinned.


I love my bird hook, you can still get this hook
from World Market, or you can try 
different hooks to match your bathroom decor.


Have you tried any crafts or DIY projects
that you found on Pinterest?
I would love to see them, go link them up on
Hope you all are having a great week,
I'm getting ready for a baby shower that I'm throwing
on Saturday & enjoying all the Detroit Tigers
games this week... Go Tigers!!
Thanks for stopping by,
xx Liz Marie

Saturday, October 8, 2011

Repurposed Birchboxes...

I wanted to share with you another Idea 
that I blogged about for BirchBox a few weeks ago.
I blogged about ways you could recycle your Birchboxes,
You can go look at the post I did {Here}.
 If you don't know what BirchBox
is you can click here or here to learn more.
Here are my lovely reused Birchboxes...


You can reuse your birchboxes for lovely gift boxes.
My friend Christine & I made these lovely boxes
with doilies, felt, and twine. 
& a gift in a handmade gift box is just an extra lovely
touch that makes the gift a little more special.


The doilies are from Michaels & so is the twine. 
We made the gift tag out of a manilla folder
& used doilies & a floral scrap book letter to decorate it. 
& Christine is the felt flower master,
so we spruced up the boxes with some lovely cream
flowers.


Ready for some more ideas for those


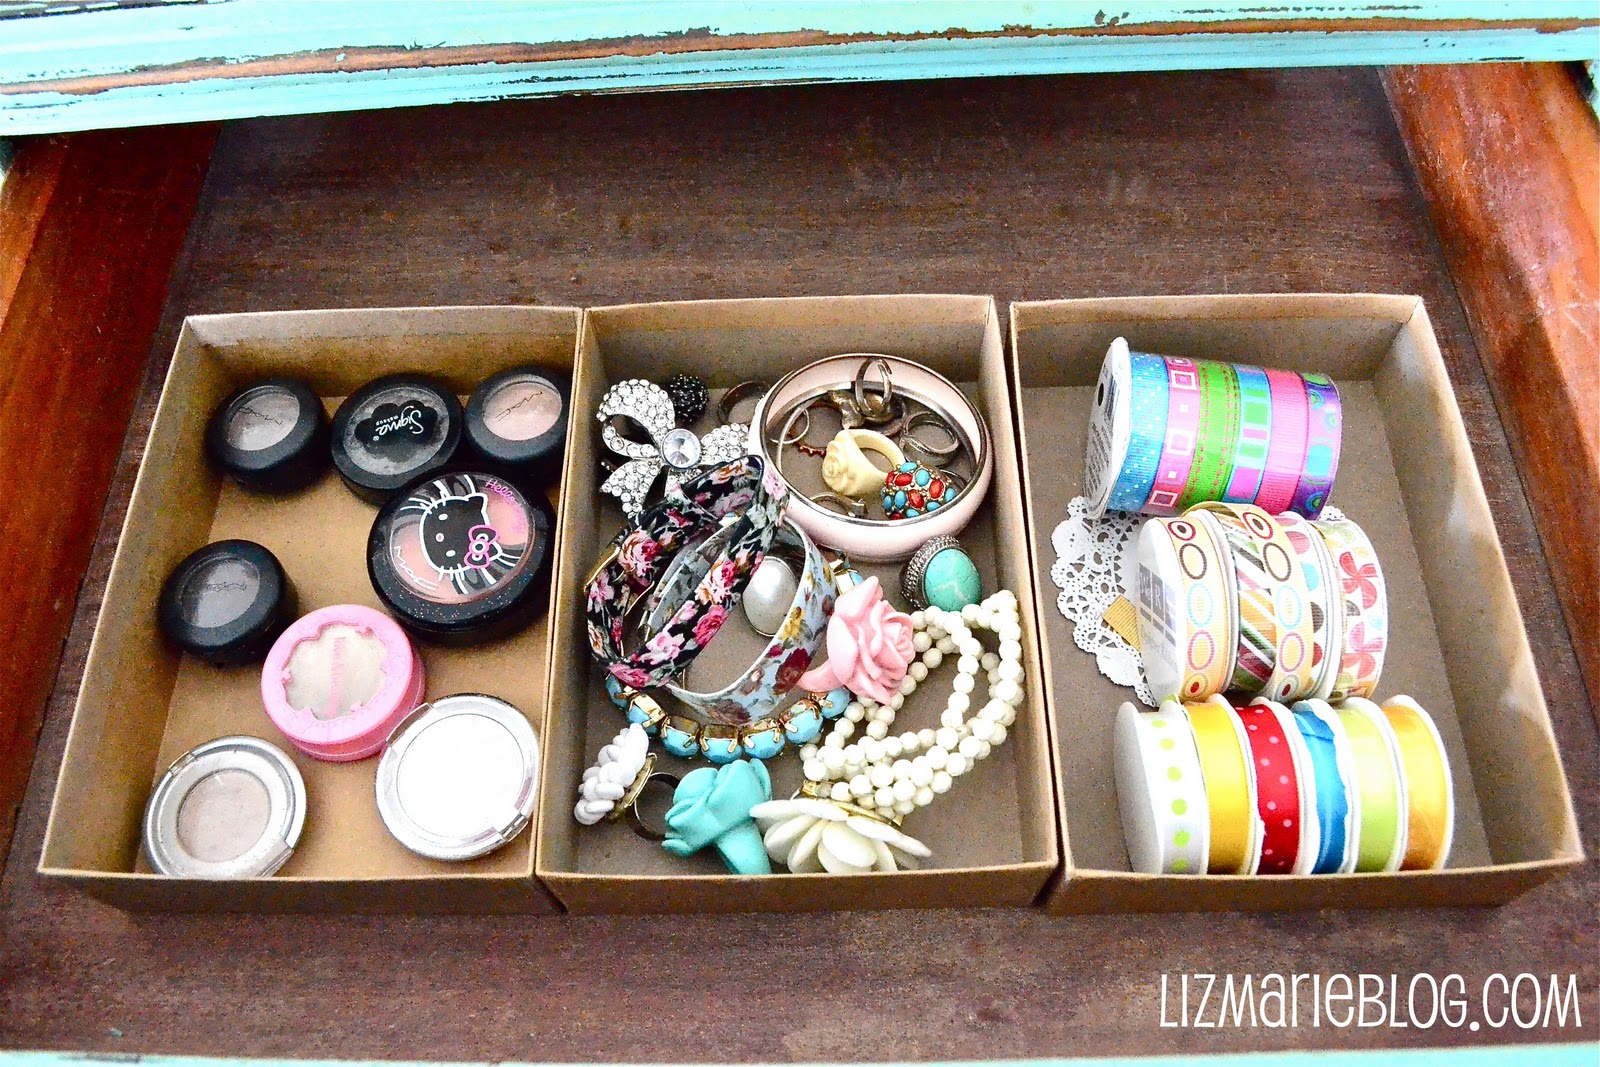
Birchboxes arre great for drawer organization...
Makeup, jewelry, craft supplies, or that junk drawer 
that you have been mean to organize forever.


& last, but certainly not the end of the possibilities
of recycling these boxes...
You can use them to organize recipes, pictures,
postcards, receipts, & so many other things.
Simply label the boxes to keep them organized & pretty.


I love recycling & repurposing things that I already have,
so this project was really fun for me.
I hope you are all having a great weekend,
my weekend has been wonderful & I'm looking forward
to the rest of the weekend as well...
Enjoy your weekend & I will talk to you later!
xx Liz Marie